
How to Configure Shopify Webhook Action Settings?
Enabling Webhook Actions
You can manage your webhook actions from the Application Settings > Integration Settings > Webhook Actions page. On this page, you can enable the webhook you want to listen to (for example, Order Fulfilled) and configure its settings.
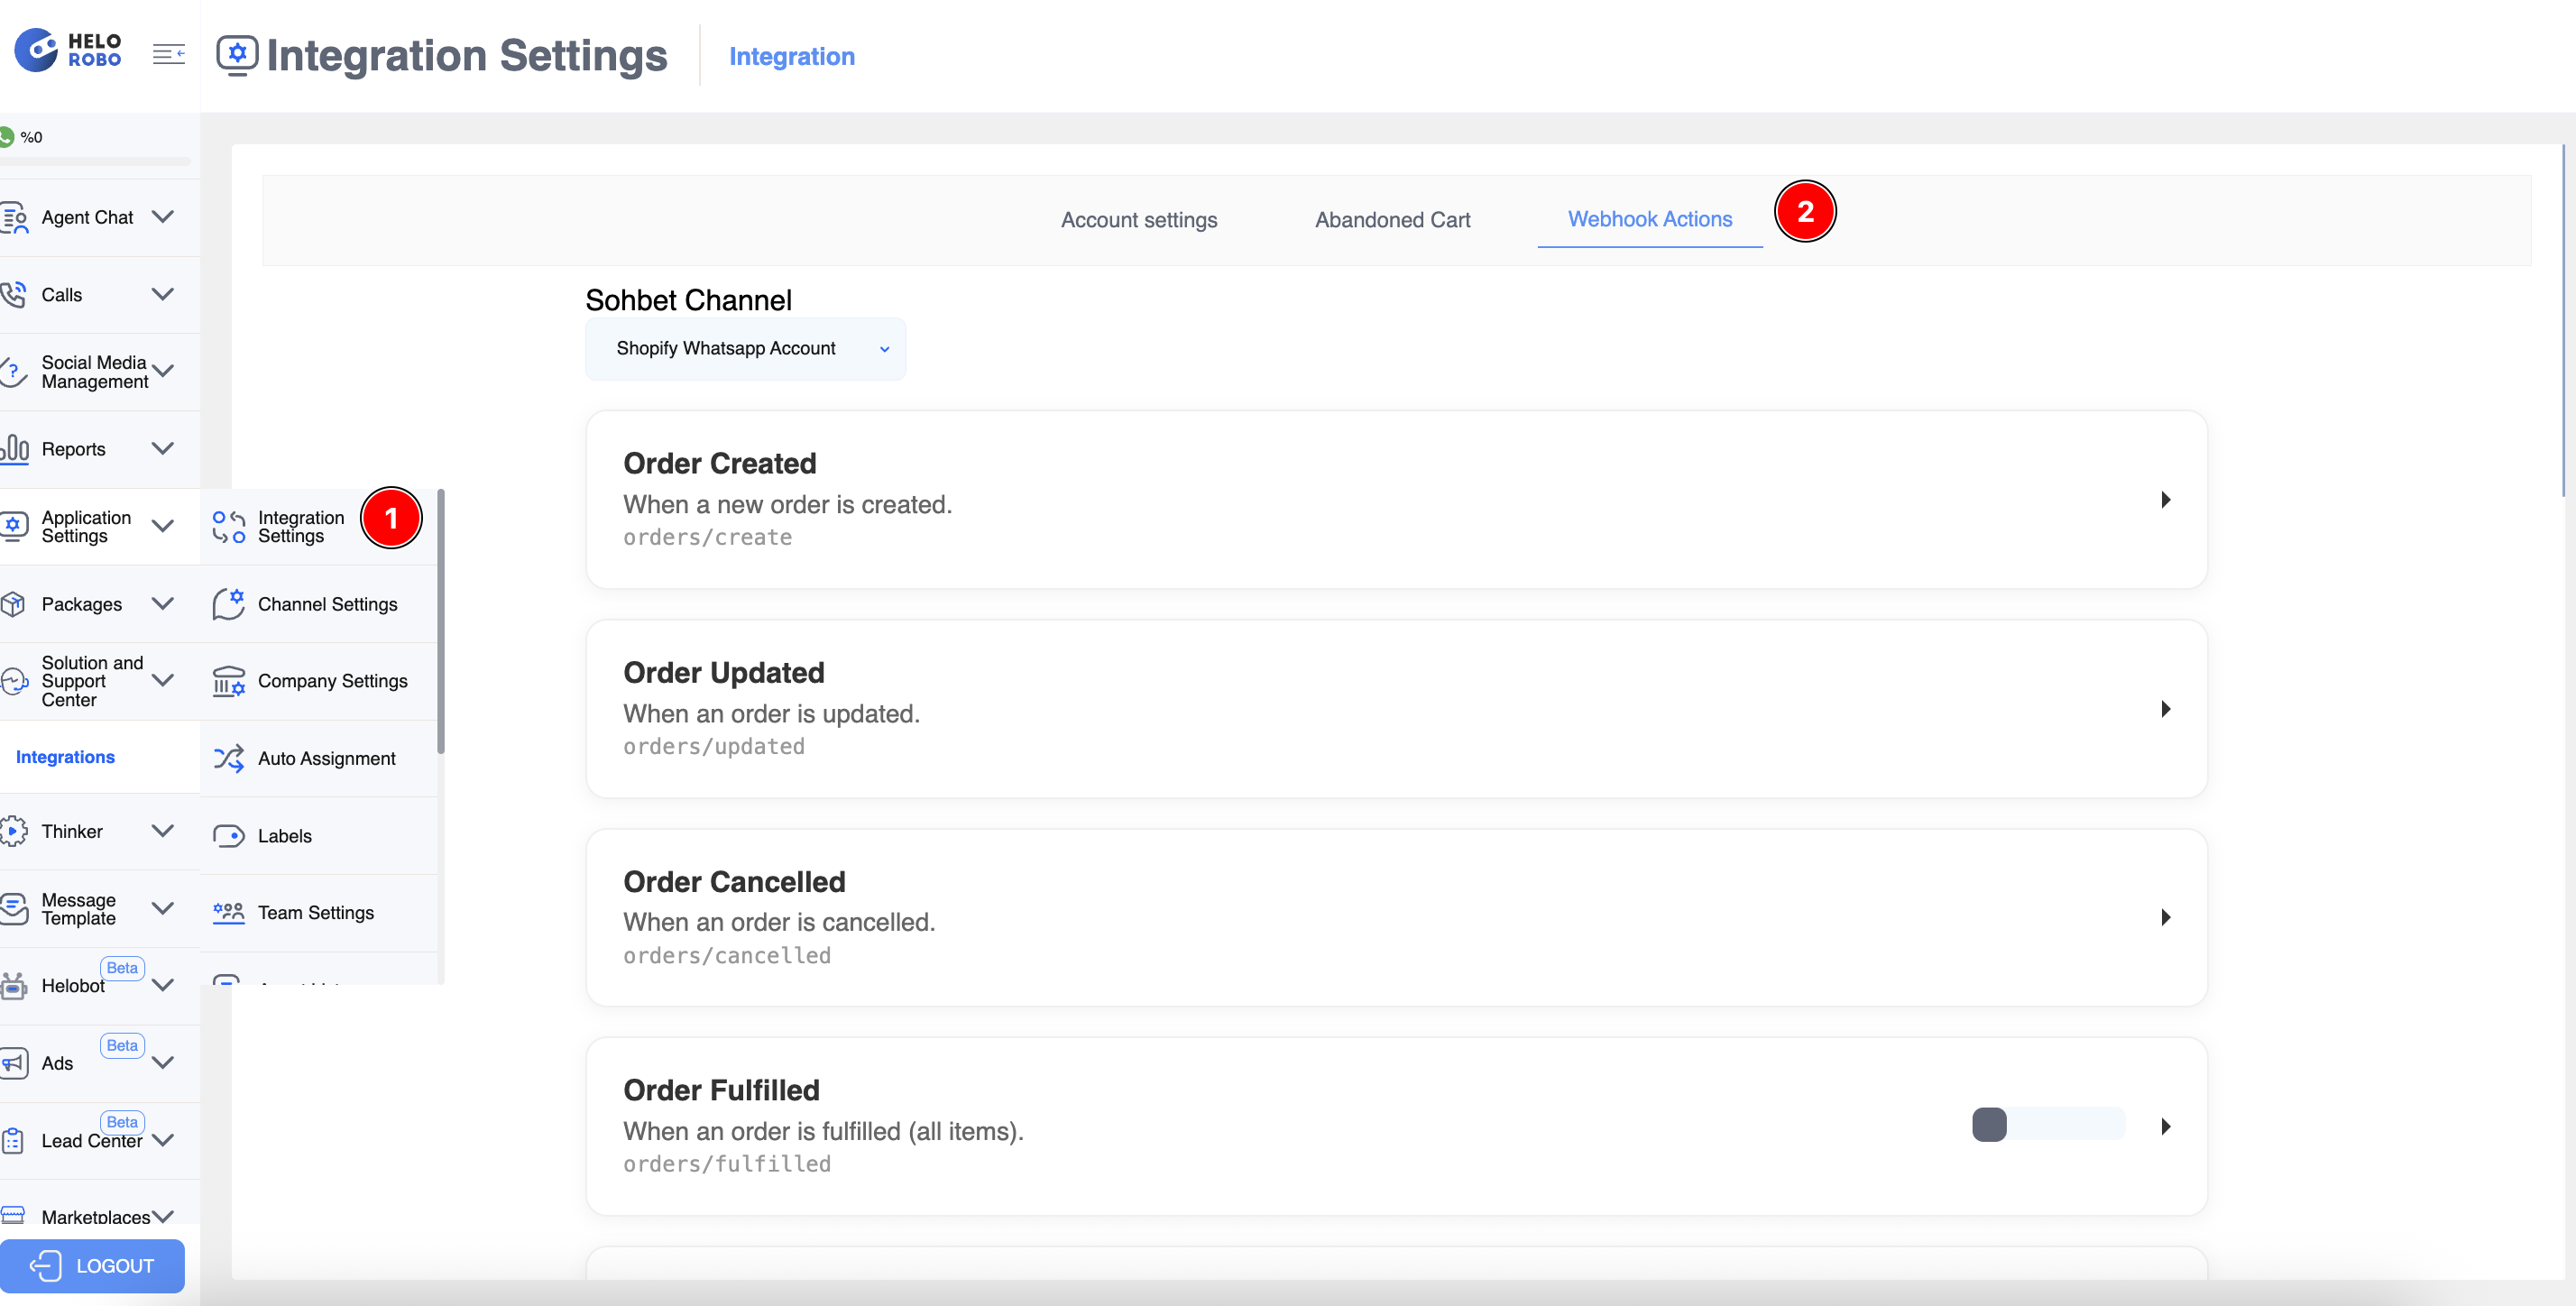
- Chat Channel: Select the channel from which the message template will be sent at the top of the page.
- Enabling the webhook: Turn on the switch on the right side of the webhook you want to listen to in order to activate the webhook action.
- Message Template: Select the message template to be sent when the webhook is triggered.
- Variable Mapping: If the selected message template contains variables, click the Select Key button for each variable and choose its value from the sample JSON. You can use the View Sample Response link to review the sample data.
- Save: After completing the settings, click the Save button.
Things to Consider
IMPORTANT
Due to a different app type, Shopify currently does not automatically send the Order Created webhook. For Order Created or any other webhooks that cannot be received automatically, a manual configuration is required on the Shopify side.
Creating a Manual Webhook in Shopify
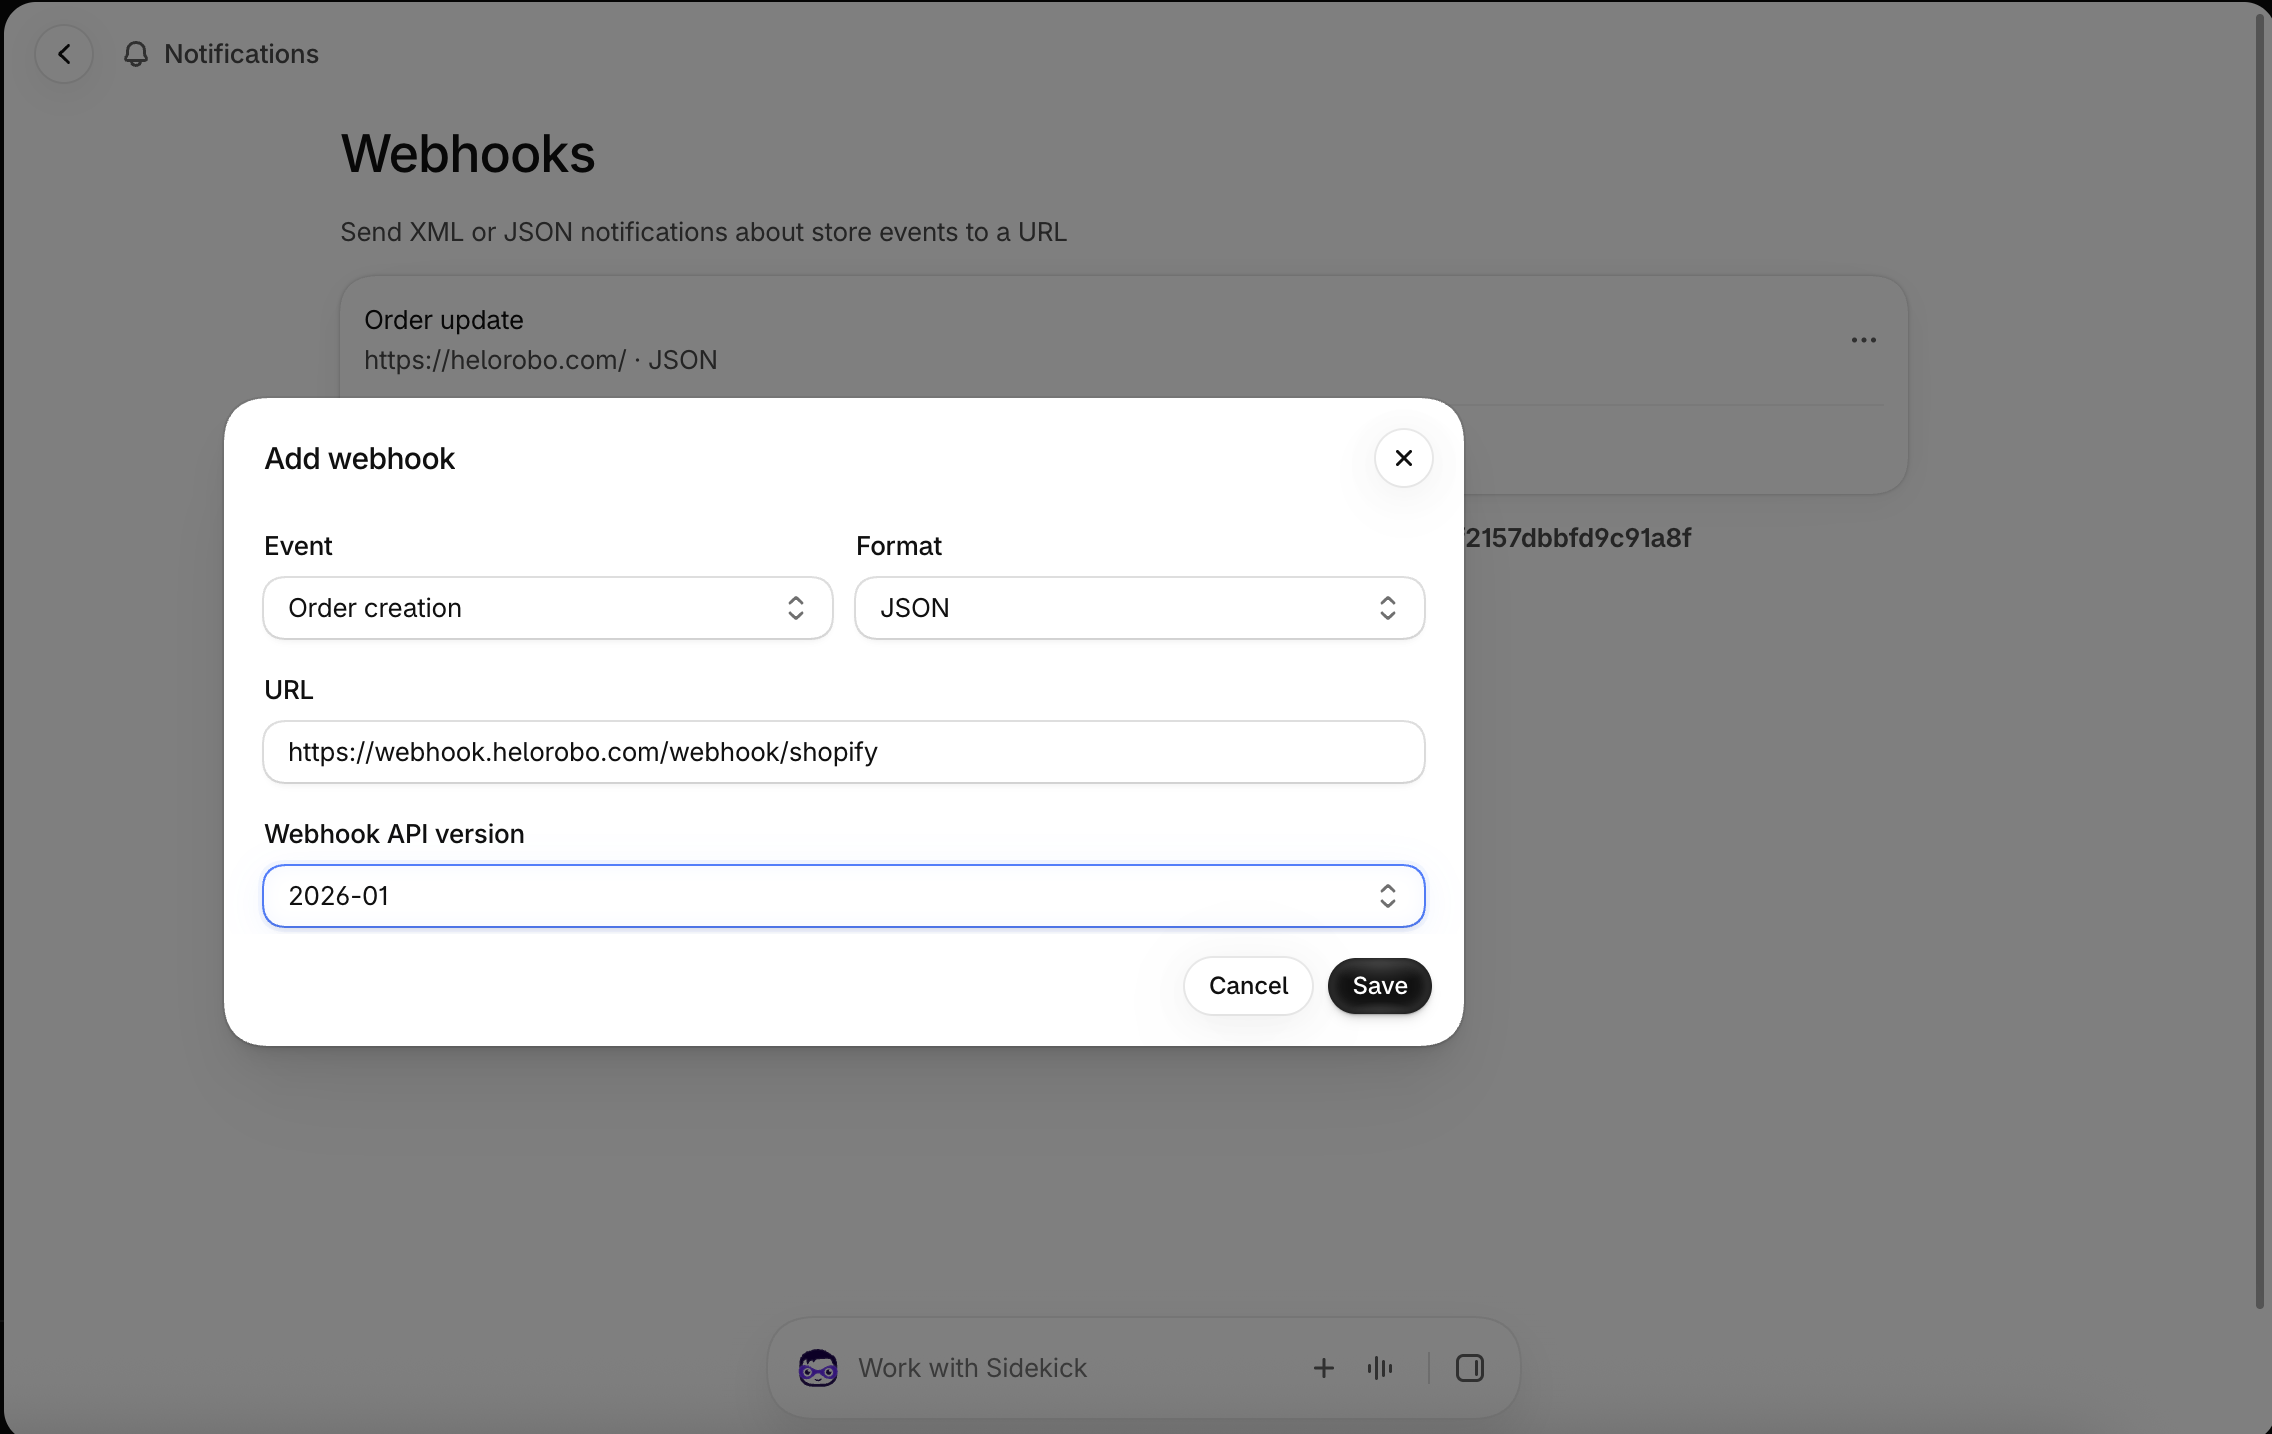
In the Shopify admin panel, go to the Settings > Notifications > Webhooks page and click the Create webhook button. Fill in the following fields in the window that opens:
- Event: Select the webhook that is not being received (for example, Order creation).
- Format: Select
JSON. - URL: Enter
https://webhook.helorobo.com/webhook/shopify. - Webhook API version: Select
2026-01.
After filling in the fields, click the Save button.